Introduction to DIY Cheese Making
There’s something truly magical about making your own cheese. It’s a craft that combines science, tradition, and a touch of creativity. And the result? A delicious, homemade delicacy that you can be proud of. In this blog post, we’ll introduce you to the joy of DIY cheese making and the unique appeal of homemade Gouda cheese.
-
- The joy of making your own cheese
Making your own cheese is a rewarding experience. It’s not just about the end product, but the process itself. It’s about understanding the science behind the transformation of milk into cheese, the satisfaction of seeing your efforts come to fruition, and the joy of sharing your homemade cheese with family and friends. Plus, when you make your own cheese, you have complete control over the ingredients and flavors. You can experiment with different types of milk, cultures, and aging processes to create a cheese that’s uniquely yours.
-
- Why Gouda? The unique appeal of Homemade Gouda Cheese
Gouda, a cheese originating from the Netherlands, is loved worldwide for its creamy, mild flavor and smooth texture. But homemade Gouda? It’s a game-changer. Making Gouda at home allows you to experience this classic cheese in a whole new way. You can control the creaminess, the sharpness, and even the color of your Gouda. Plus, homemade Gouda has a fresh, rich flavor that’s hard to find in store-bought versions. It’s a cheese that’s versatile enough for a cheese board, a sandwich, or a gourmet recipe. And the best part? It’s surprisingly easy to make at home, even for beginners.
Ready to embark on your cheese making journey? Let’s dive into the world of homemade Gouda cheese.
Getting Started with Making Gouda at Home
If you’re a cheese lover, making your own Gouda at home can be an exciting and rewarding experience. It’s not as complicated as it might seem, and with the right tools and ingredients, you can create a delicious, homemade Gouda that rivals any store-bought variety.
Essential Tools for DIY Cheese Recipes
Before you begin your cheese-making journey, it’s important to have the right tools on hand. These tools will help ensure that your cheese-making process goes smoothly and that your final product is of the highest quality.
-
- Choosing the right equipment for cheese making
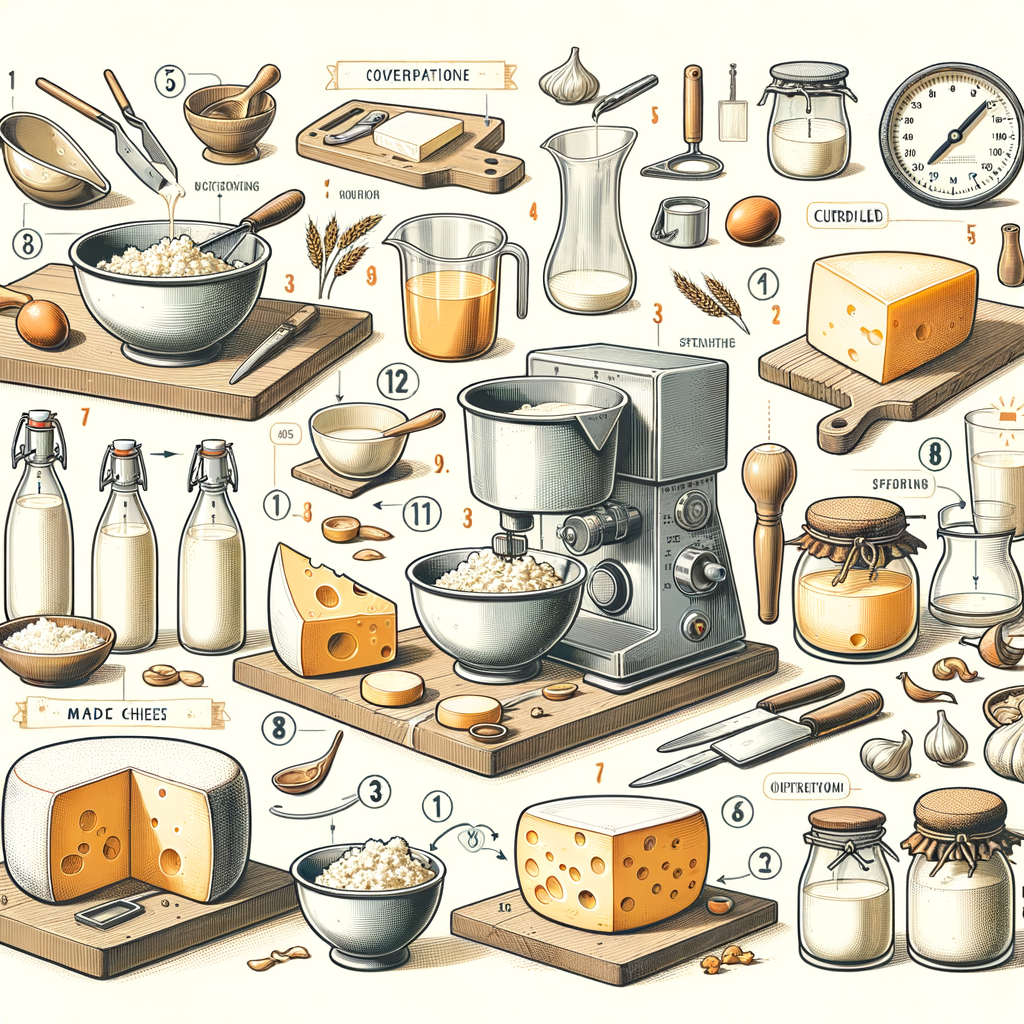
There are several essential tools you’ll need for making cheese at home. These include a large stainless steel pot for heating your milk, a cheese thermometer to monitor the temperature, a long knife for cutting the curd, and cheese molds for shaping your final product. Additionally, you’ll need cheese cloth for draining the whey, and a cheese press for pressing the cheese into its final shape. Each of these tools plays a crucial role in the cheese-making process, so it’s important to choose high-quality items.
-
- Where to buy cheese making tools
You can find cheese making tools at a variety of locations. Many kitchen supply stores carry the basic tools you’ll need, and there are also numerous online retailers that specialize in cheese making supplies. Websites like Amazon and eBay also have a wide selection of cheese making tools. When purchasing your tools, be sure to read reviews and choose reputable sellers to ensure you’re getting high-quality equipment.
With the right tools in hand, you’re ready to start your cheese-making journey. Making cheese at home is a process of learning and discovery, so don’t be afraid to experiment and have fun with it. Happy cheese making!
Ingredients for Your Gouda Cheese Recipe
-
- Quality of milk: What to look for
Milk is the primary ingredient in cheese making. The quality of milk you use will significantly impact the taste and texture of your Gouda cheese. When selecting milk for your cheese, opt for raw or pasteurized milk. Avoid ultra-pasteurized or UHT milk as they do not form a proper curd. The milk should be fresh and free from additives. If you can get your hands on farm-fresh milk, that’s even better! The milk’s fat content will also affect the cheese’s creaminess, so consider this when choosing your milk.
-
- Choosing your cheese cultures and rennet
Cheese cultures are essential in cheese making as they help develop the cheese’s flavor and texture. For Gouda cheese, you will need mesophilic starter cultures. These cultures work best at room temperatures and are perfect for making semi-hard cheeses like Gouda. Rennet is another crucial ingredient in cheese making. It helps coagulate the milk, turning it from a liquid to a solid. You can choose between animal or vegetable rennet, depending on your preference.
-
- Other essential ingredients for Gouda
Aside from milk, cultures, and rennet, you will also need cheese salt and calcium chloride. Cheese salt helps enhance the flavor of the cheese and acts as a preservative. It is different from table salt as it does not contain iodine, which can inhibit the growth of the cheese cultures. Calcium chloride, on the other hand, helps restore the calcium balance in pasteurized milk, ensuring a firm curd. Lastly, you will need a cheese mold and cheese wax for shaping and aging your Gouda cheese.
How to Make Gouda Cheese: Step-by-Step Guide
Creating your own Gouda cheese at home can be a fun and rewarding experience. Let’s dive into the first stage of the process: the preparation stage.
Preparation Stage
Before we start making our delicious Gouda cheese, we need to ensure that our equipment is clean and our ingredients are ready. Here’s how:
-
- Sanitizing your equipment
It’s vital to sanitize all your cheese making equipment before you start. This includes pots, spoons, cheese molds, and thermometers. You can use a mild bleach solution or a food-grade sanitizer for this purpose. Rinse thoroughly with hot water to remove any residual sanitizer. Note that cleanliness is key to prevent unwanted bacteria from affecting your cheese.
-
- Preparing the milk and adding the cultures
Start with fresh, high-quality milk. You can use cow, goat, or sheep milk for making Gouda. Heat the milk to 32°C (90°F) in a large pot. Once the milk reaches the desired temperature, add the cheese cultures. These cultures are responsible for the flavor and texture of the cheese. Stir gently to mix the cultures into the milk.
Now that we have our equipment sanitized and our milk prepared, we’re ready to move on to the next stage of making Gouda cheese. Stay tuned for the next steps in this exciting cheese-making journey!
Cheese Making Techniques: The Art of Curdling
One of the most crucial steps in cheese making is curdling. This process involves the coagulation of milk proteins, which results in the formation of curds. The curdling technique is an art in itself and requires precision and patience. Let’s delve into the two main steps of this process.
-
- Adding the rennet and cutting the curd
Rennet, a natural enzyme found in the stomachs of ruminant animals, is the key ingredient that triggers the curdling process. When added to warm milk, rennet causes the milk proteins to coagulate, forming a gel-like substance. After the rennet has been added, the milk is left to rest for about an hour. Once the curd has set, it is cut into small pieces using a curd knife. This step is crucial as it helps to separate the curds from the whey, the liquid part of the milk.
-
- Cooking and washing the curd
After cutting the curd, the next step is cooking and washing. This involves gently heating the curds and whey mixture while stirring continuously. The heat causes the curds to shrink and harden, releasing more whey. The curds are then washed with warm water to remove any remaining whey and lactose. This step is important as it influences the final texture and flavor of the cheese.
Mastering the art of curdling is a key step in making delicious homemade cheese. With practice, you’ll be able to create a variety of cheeses with different textures and flavors. Happy cheese making!
Shaping and Pressing Your Gouda
After the curdling process, shaping and pressing your Gouda cheese is the next crucial step. This stage determines the final look and texture of your cheese. Let’s explore how to shape your cheese and the pressing techniques for the perfect Gouda.
- How to Shape Your Cheese
Shaping your cheese is an art that requires patience and precision. Here’s a simple guide to help you shape your Gouda cheese:
- First, transfer the curd into a cheese mold. The mold should be sanitized and lined with a cheesecloth.
- Ensure the curd is evenly distributed in the mold to avoid air pockets. This will give your cheese a smooth texture.
- Once the curd is in the mold, fold the cheesecloth over the top. The cloth will help to keep the shape of the cheese while it drains.
- Pressing Techniques for the Perfect Gouda
Pressing your Gouda cheese is essential to remove any remaining whey and to firm up the cheese. Here are some techniques to ensure you get the perfect Gouda:
- Start with a light press. This allows the curd to knit together without trapping too much whey.
- Gradually increase the pressure. This helps to expel more whey and gives the cheese its firm texture.
- Ensure the cheese is pressed evenly. Uneven pressing can lead to cracks and holes in the cheese.
- Press the cheese for at least 8 hours. This ensures that the cheese has a firm and smooth texture.
An answer to a perfect Gouda cheese lies in patience and precision. Happy cheese making!
Aging Your Homemade Gouda Cheese
Once you’ve completed the process of making your Gouda cheese, the next crucial step is aging it. This process, also known as curing, is what gives the cheese its unique flavor and texture. Let’s explore how you can create the right environment for aging and how long to age your Gouda cheese.
-
- Creating the Right Environment for Aging
To age your Gouda cheese properly, you need to create a controlled environment that mimics the conditions of traditional cheese caves. This involves maintaining the right temperature and humidity levels. The ideal temperature for aging Gouda cheese is between 50 and 55 degrees Fahrenheit (10-12 degrees Celsius), and the humidity level should be around 85%. You can achieve this by using a dedicated cheese fridge or a wine cooler. It’s also important to turn the cheese regularly to ensure even aging.
-
- How Long to Age Your Gouda
The aging period for Gouda cheese can vary depending on your taste preference. Generally, Gouda cheese is aged for a minimum of 2 months. However, for a stronger, more robust flavor, you can age it for up to 2 years. The longer you age your cheese, the harder and more flavorful it becomes. It’s all about finding the balance that suits your palate.
Aging your homemade Gouda cheese is an art that requires patience and precision. But the reward is a delicious, homemade cheese that you can be proud of. Happy cheese making!
Enjoying Your Homemade Cheese: Gouda Cheese Recipes
Now that you’ve successfully made your homemade Gouda cheese, it’s time to enjoy the fruits of your labor. Gouda, with its rich, creamy, and slightly sweet flavor, is versatile and can be used in a variety of dishes. Here are a couple of delicious recipes that you can try with your homemade Gouda cheese.
Cheese Lovers Recipes: Cooking with Gouda
Are you ready to take your love for cheese to the next level? Here are two simple yet mouth-watering recipes that you can make using your homemade Gouda cheese.
-
- Gouda Mac and Cheese
Mac and cheese is a classic comfort food, and using Gouda cheese takes it to a whole new level. The creaminess of the Gouda pairs perfectly with the pasta, creating a dish that is both comforting and indulgent.
-
- Gouda Grilled Cheese Sandwich
Nothing beats a good grilled cheese sandwich, and using Gouda cheese makes it even better. The Gouda melts beautifully, creating a sandwich that is crispy on the outside and gooey on the inside. A classic recipe for a Gouda Grilled Cheese Sandwich can be found here.
By using your homemade Gouda cheese, you’re ensuring that your dishes are not only delicious but also made with love and care. Happy cooking!
Pairing Your Gouda: A Guide for Cheese Lovers
Once you’ve mastered the art of making your own Gouda cheese, the next step is to learn how to enjoy it to the fullest. Pairing your homemade Gouda with the right wine and creating a cheese board can elevate your cheese tasting experience. Here are some tips to get you started.
-
- Best wines to pair with Gouda
Gouda cheese has a rich, creamy, and slightly sweet flavor that pairs well with a variety of wines. However, the best matches are often medium-bodied red wines like Merlot and Pinot Noir, as well as white wines like Chardonnay and Riesling. These wines have the right balance of acidity and fruitiness to complement the creamy and nutty characteristics of Gouda.
-
- Creating a cheese board with your homemade Gouda
Creating a cheese board is an art in itself. Start with your homemade Gouda as the star of the show. Add a variety of other cheeses for contrast, such as a sharp Cheddar or a tangy Blue. Include some fresh fruits like grapes and apples, as well as dried fruits like figs and apricots. Don’t forget to add some crunchy elements like nuts and crackers. Lastly, you can add some sweet and savory spreads like honey and mustard.
Enjoying your homemade Gouda cheese is all about experimentation and finding what works best for your palate. So, don’t be afraid to try different pairings and have fun with it!
Conclusion: Mastering the Art of Gouda Cheese DIY
As we reach the end of this enlightening journey into the world of homemade Gouda cheese, it’s time to recap what we’ve learned and look forward to the exciting next steps for the aspiring cheese maker.
- Recap of the cheese making process
Let’s take a moment to revisit the key stages of the Gouda cheese making process:
- Preparation: Gathering all necessary ingredients and equipment.
- Culturing and curdling: Adding starter cultures and rennet to the milk to form curds.
- Curds cutting and washing: Cutting the curds into small pieces and washing them to remove lactose.
- Pressing: Pressing the curds to form a solid cheese wheel.
- Brining: Soaking the cheese in a saltwater brine to enhance flavor and preserve the cheese.
- Aging: Allowing the cheese to mature over time to develop its distinct flavor and texture.
- Next steps for the aspiring cheese maker
Now that you’ve mastered the art of making Gouda cheese at home, what’s next? Here are a few suggestions:
- Experiment with flavors: Try adding herbs, spices, or even fruits to your Gouda cheese for a unique twist.
- Try other cheese types: Expand your cheese making skills by trying other types of cheese like Cheddar, Brie, or Mozzarella.
- Join a cheese making community: Connect with other cheese enthusiasts to share recipes, tips, and experiences.
- Teach others: Share your newfound knowledge and skills with friends and family. Who knows, you might inspire a new generation of cheese makers!
The journey of cheese making is a rewarding one. With each batch, you’ll gain more experience, knowledge, and most importantly, delicious homemade Gouda cheese. Happy cheese making!

